

How To Turn Off Texture Packs In Minecraft
This browser is no longer supported.
Upgrade to Microsoft Border to take advantage of the latest features, security updates, and technical back up.
Introduction to Resource Packs
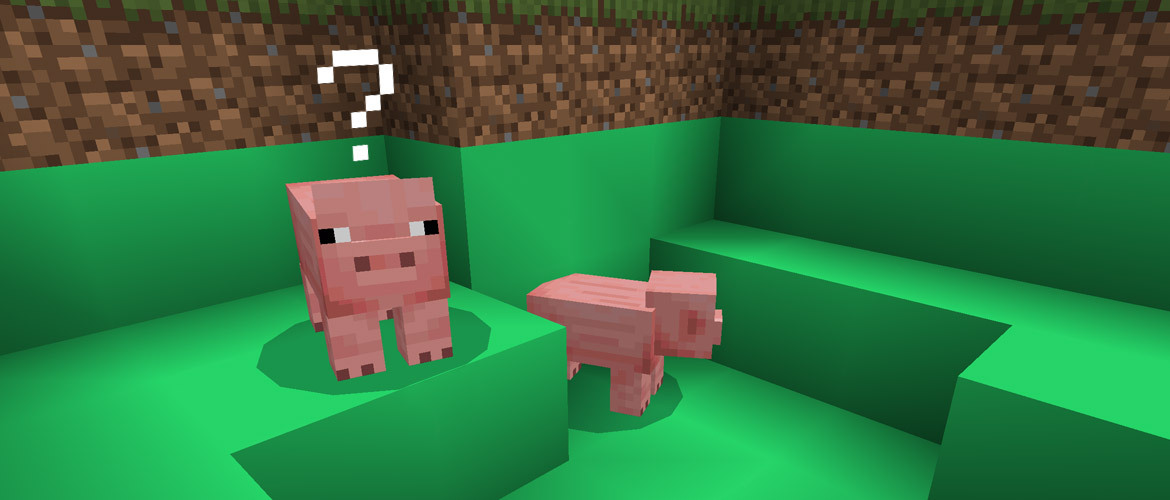
Before building your first Add together-On for Minecraft: Boulder Edition, y'all will need to create a pack to hold your custom content. At that place are two types of packs that a creator can brand: resource packs and behavior packs. A resources pack is a binder structure that will incorporate all of your custom models, sounds, textures, and other custom content. This tutorial volition modify the colour of dirt to a brilliant dark-green.
In this tutorial, you will learn the following:
- How a resources pack is created.
- How a manifest file is created.
- How custom textures are loaded into Minecraft.
- The concept of Pack Stacking when working with Improver content.
Sample Resource Pack
There is a sample resource pack available on the Minecraft samples Github. information technology may be used to understand the structure of resource packs and to check your work after the tutorial.
Requirements
We recommend completing the following be completed earlier commencement this tutorial:
- Getting Started with Add-On Development
Building the Resource Pack
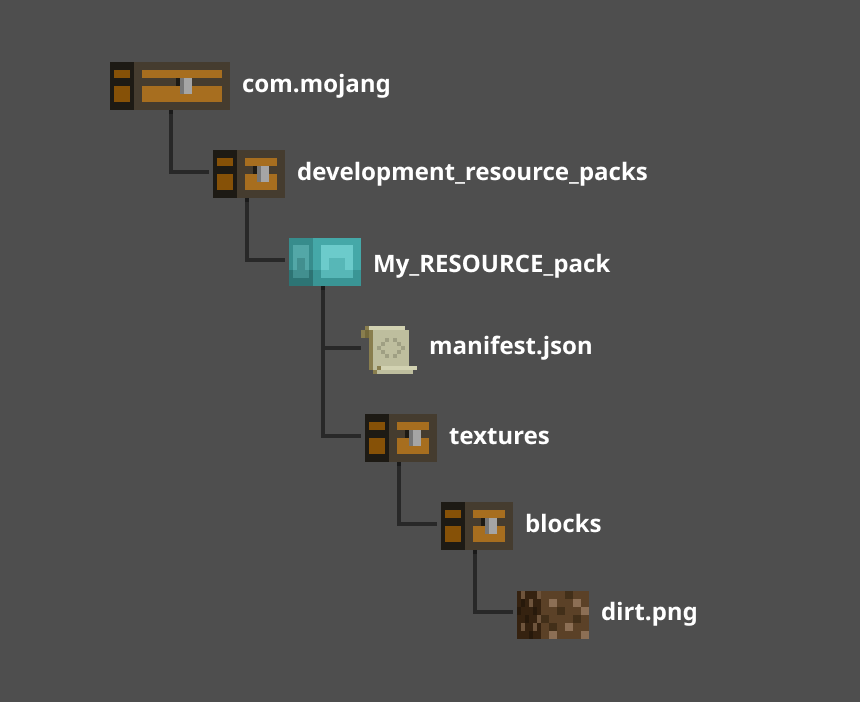
For Minecraft to find and utilise your resource files, you have to ready the folders and files in a particular construction. This tutorial will guide you through creating this folder and file construction.
Create a folder
In this section, you will start by creating a folder called My_RESOURCE_Pack. Well, you don't take to call information technology that. In fact, you lot can name this folder anything you desire, but the other folders have to be named exactly like this tutorial says and then that Minecraft knows where to look.
- Open your com.mojang folder.
- Double-click the development_resource_packs folder to open information technology.
- Add a new binder and name information technology My_RESOURCE_Pack.
- Double-click the *My_RESOURCE_Pack folder to open it.

Create a Manifest File
To load a resources pack into Minecraft, a manifest file will demand to be created. The manifest file is a JSON file that contains the following information:
- Description: In-game clarification of what the resource pack does.
- Proper name: In-game name of the resource pack.
- UUID: Universally Unique Identifier.
- Version: Version of the resource pack.
- Minimum Engine Version: Required version of Minecraft that this pack volition work in.
Annotation
To learn more near how a manifest.json file works, see the the Addons Reference manifest.json documentation.
Minecraft will parse the data from the manifest file and display it in the Add-on section of the game. Inside the file, the information will be split into ii separate sections: header and modules. The header section volition incorporate the overall data for the pack, and the modules section will contain the defended packages information.
- Right-click in the Explorer window, select New > Text Document.
- Proper name it manifest.json.
- Yous will need to modify the file extension from .txt to .json. If your Explorer window does non testify file extensions, you tin enable File Name Extensions under the View tab.

- Yous will need to modify the file extension from .txt to .json. If your Explorer window does non testify file extensions, you tin enable File Name Extensions under the View tab.
- Double-click the manifest.json file to open it in a text editor.
- Copy and paste the following code into your file.
{ "format_version": 2, "header": { "description": "My clay resource pack Add-On!", "proper name": "My Resource Pack", "uuid":"", "version": [1, 0, 0], "min_engine_version": [1, sixteen, 0] }, "modules": [ { "description": "My First Add-on!", "type": "resources", "uuid": "", "version": [1, 0, 0] } ] } UUID
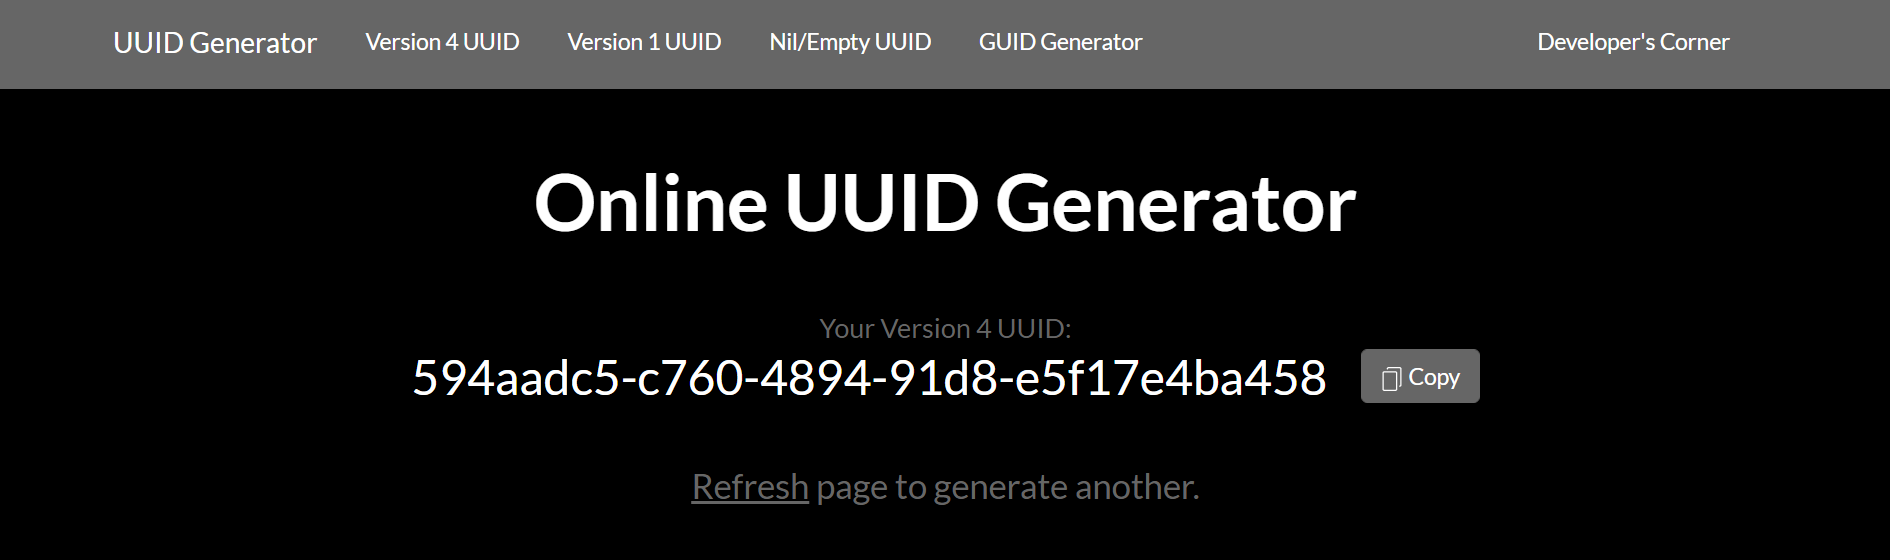
Universally Unique Identifier, or UUID for short, is a unique number used to identify different software. For Minecraft, the UUID is used to ascertain a specific pack and to prevent whatever duplicate software from causing issues. For the header and modules, in that location will need to be two different UUID numbers entered in each of the "uuid" fields between the quotes. Y'all tin get UUIDs from an online UUID Generator such every bit https://www.uuidgenerator.internet/.
- Copy and paste a UUID into the header department. The UUID volition need to exist pasted in the
"uuid":""field between the quotation ("") marks to be read correctly. - Refresh the webpage to generate a new UUID for use in the Modules section.
- Re-create and paste the new UUID into the modules department in the
"uuid"field between the quotation marks. - Save the manifest.json file.
Changing the dirt cake
With the manifest file completed, y'all tin can now showtime calculation custom content to Minecraft. Permit'south become started by applying a new texture to the vanilla dirt block. The get-go function of the process involves creating a folder structure to agree the texture.
- In File Explorer, in the My_RESOURCE_Pack folder, create a binder and proper name information technology textures.
- Double-click the textures folder to open information technology.
- Inside the textures binder, create a binder and proper noun it blocks.
- Double-click the blocks folder to open it.
Creating the texture
Now that the folder structure is created, you can place your custom textures there. This little, dark-green square is an example of the type of file created by the following steps.

You can download it and save it in your blocks binder or follow these steps to create your texture:
- Open upwards an epitome editor such as MS Paint.
- Go to the File card and select Properties.
- Set the Width and Height to 16 pixels each.
- Click OK.
You can at present pattern a blueprint or any artwork in the editor. To make the green foursquare, a simple fill color was added.
Note
MS Paint is used in this instance for quick and easy access, but you will demand to employ a different graphics editor for more avant-garde graphic features like transparency effects or .tga file support.
- When you're done editing your texture, get to the File carte du jour and select Save As.
- Choose the PNG picture choice.
- In the Save Equally dialog box, navigate to the blocks folder you created.
- Salvage the file equally clay.png.
Testing the pack
At present that the pack has both a manifest file and a texture file, you can launch Minecraft and test your new resource Add-On.
Of import
Pack Stacking is how content is loaded on top of vanilla content, causing each object that has the same proper name in both packs to be overwritten past the latest practical pack. In our example, the original dirt texture is overwritten by our custom texture.
If another pack that uses the dirt.png file is loaded afterward My_RESOURCE_Pack, and then Minecraft will employ that ane instead and you won't see that change.
Your custom texture will be used on every dirt.png block in the world, simply information technology will non exist used on blocks of dirt with grass on them because those blocks take a different name.
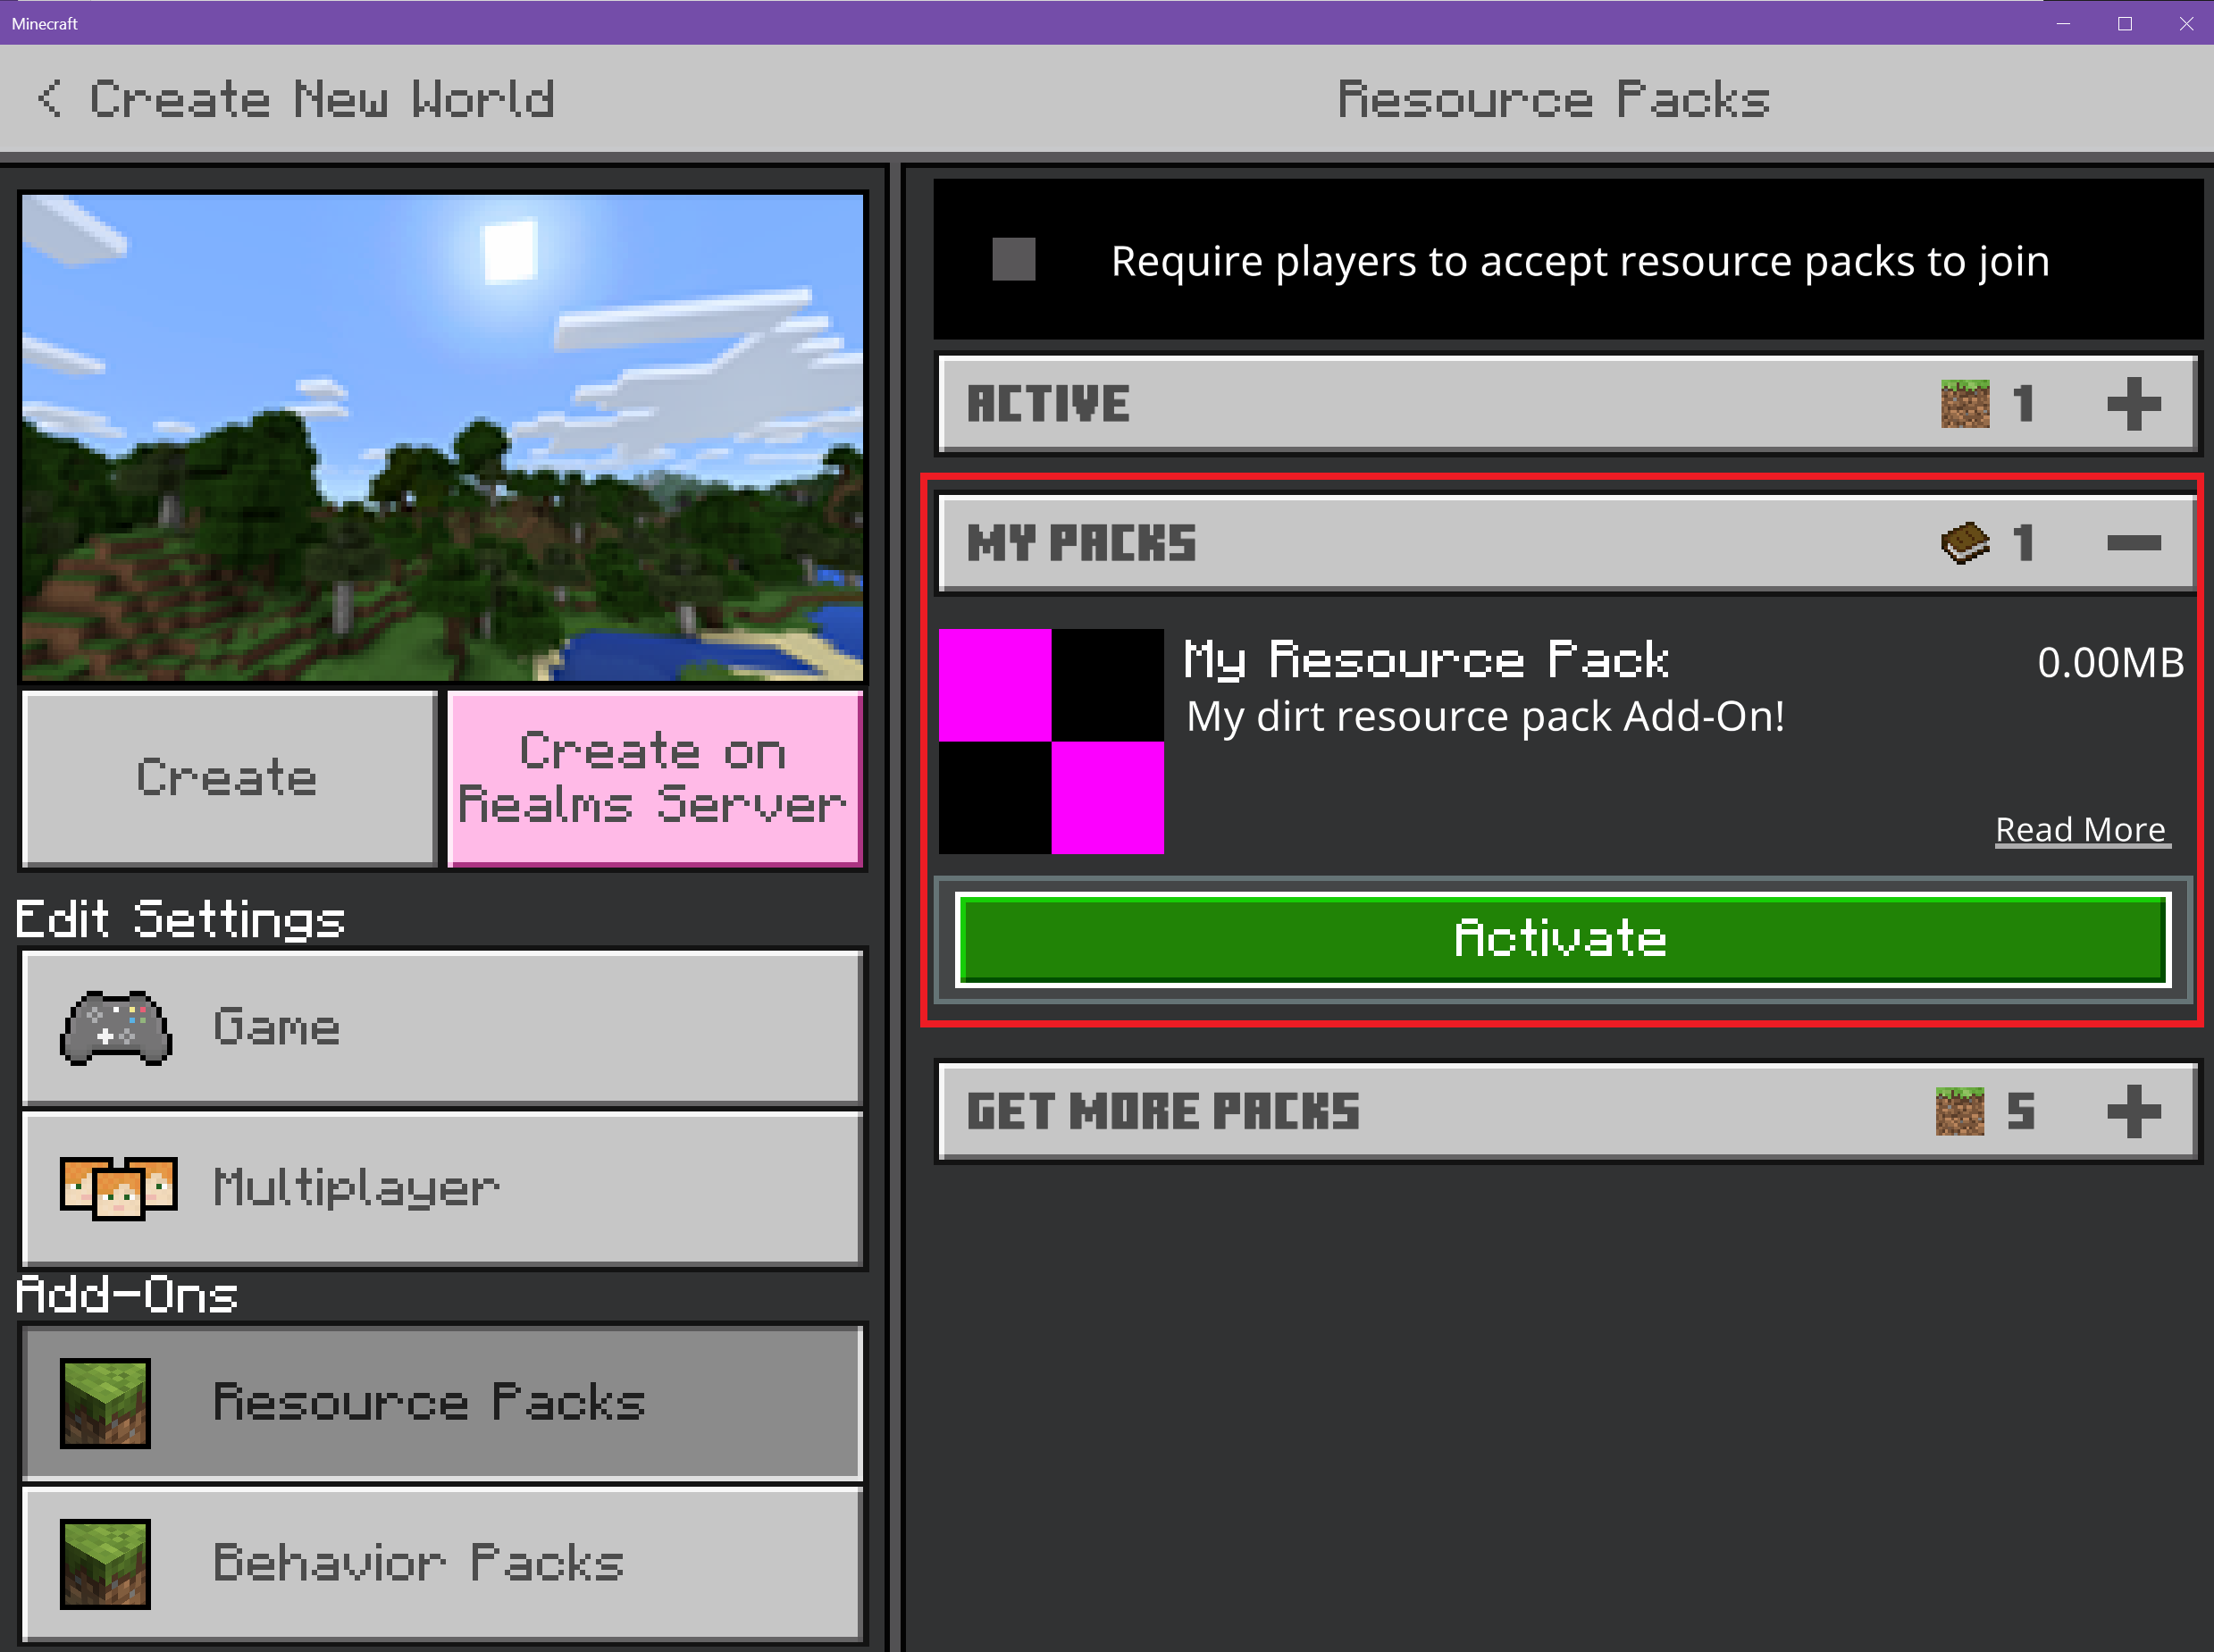
- Launch Minecraft and select Play.
- Select Create New World.
- Under Settings, scroll downward to the Add together-Ons section.
- Click on Resource Packs to come across all available packs.
- Click the MY PACKS drop-downwards to open up it.
- Select My RESOURCE Pack and click Activate to add the resource pack to the world.
- Click Create to create your globe.
Troubleshooting
Resources pack woes? Troubleshooting is a normal part of any development process. Here are some places to outset troubleshooting a missing resource pack.
You can employ the sample resources pack on the Minecraft samples Github site to bank check the structure of your resource pack.
Your Resource Pack Does Not Appear in Minecraft
If your resource pack does non appear in the Add-Ons department of a world, that points to a malformed manifest.json file. Let's investigate it.
- Are at that place two different UUIDs in the
manifest.jsonheader and modules department? Run into the UUID department for more information. - Have you turned on file extensions and paths? If your Explorer window does not show file extensions, you tin can enable File Proper name Extensions under the View tab.
- Double-check JSON curly braces and brackets. JSON linting tools can help.
Resource Pack Shows Up, Content Doesn't Work
- Check that the
texturesfolder is in the right place, and spelled correctly. Then check theblocksbinder as well. - Download the Vanilla resources pack and endeavour adding your block to the existing
textures/blocksfolder. - Make certain the new texture file is named the aforementioned as the vanilla texture you're replacing.
- Move your pack higher up others to ensure your
dirt.pngtexture is loaded earlier other resource packs cheers to pack stacking.
What's Next?
With a custom texture now a part of your Minecraft world, it'south time to see how behavior packs alter existing entity behaviors. In the next section, you will add together aggressive behavior to a unremarkably peaceful moo-cow entity.
To see examples of unchanged resource and beliefs files, bank check out the Minecraft Vanilla resources pack and Vanilla behavior Pack.
Feedback
Submit and view feedback for

How To Turn Off Texture Packs In Minecraft,
Source: https://docs.microsoft.com/en-us/minecraft/creator/documents/resourcepack
Posted by: mcmasterswhins1943.blogspot.com
0 Response to "How To Turn Off Texture Packs In Minecraft"
Post a Comment